In a previous blog, I talked about a method of adding some more punch to your pictures by incorporating a black and white layer into the workflow by watching a webinar presented by Topaz labs "The Topaz & Photoshop Workflow: Tips, Tricks and Techniques for Creative Imagery...FAST!!, with Glyn Dewis".
Today as I was searching through some images that I had taken this fall in New Hampshire, I found an image of a waterfall that I did not like in color and had made a black and white of the image.
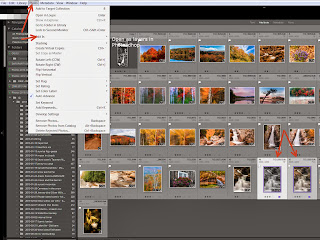
 I started wondering could I incorporate these two pictures together and create a better image. Well, I had nothing to do and would only cost me some time so I decided to try. First, I selected both of the images in Lightroom, and under Photo I selected Edit In > Open As Layers In Photoshop.
After the images were opened as layers in Photoshop, the first thing I had to do was to change the order of the layers and make the black and white layer be the top layer.
 |
| Position of Layers after Import |
 |
| Layers Position Changed |
 |
| Blending Mode Selected |
 |
| Blending Mode Changed |
Here is the final composite picture. Notice the improvement from the original.There is more pop to the image , the shadows are opened and the water looks better.
 |
| Final Image |
However, if you are starting from scratch then the methodology that was shown in the Topaz webinars is probably the best way to go. The video should be loaded on the site within the week http://www.youtube.com/user/topazlabs.


No comments:
Post a Comment