Showing posts with label post-processing. Show all posts

Saturday, August 2, 2014

Fog, Love It

Schoodic Peninsula in the fog.  If you put a recognizable object in the foreground.  It helps set the tone for the photograph.
If you travel to down East Maine, the Oregon, Washington and British Columbia coasts are along the ocean anywhere you can have fog.  A number of people will say fog it.  There is nothing to photograph, but fog can give you very interesting pictures.  In a previous blog, I showed you one way of correcting a foggy picture.  Today, let's discuss how to deal with fog.  Fog does two things, it will make the scene dimly lit and because of all the water vapor in the air, that reflects light it will cause your light meter to read wrong.  You can correct both of these problems by one, increasing your exposure and two, dial in positive exposure compensation. 

Last year, I also wrote a blog on fog.  In that blog, I was talking about utilizing aperture priority, as you mode setting.  In the present blog, I am now utilizing manual settings.  However, the same corrections hold true, you need to dial in positive exposure compensation.  Now you may ask, why did I change from utilizing aperture priority mode to manual mode.  I believe manual mode gives me better control of what I am photographing.  But, a caveat, I still will use aperture priority, and even shutter priority in certain situations.

All the following pictures were taken in manual mode, on a tripod and with a wired shutter release. 

We'll start out with West Quoddy light in the fog.

West Quoddy light in the fog.  There was no exposure compensation, and though the histogram is not bad, there is still room to expose to the right.
West Quoddy light in the fog.  I had change the scene slightly, but the sightings were the same, except I added +1 exposure compensation, and the histogram is exposed more to the right.
This is a picture of the light at top of West Quoddy lighthouse.  I added +1 exposure compensation and noticed a histogram is exposed to the right, without touching the right side.
In this picture of the light of West Quoddy lighthouse, I decreased by exposure compensation to +.5.  The reason for that is that the light was on, and if I did not decrease my exposure compensation.  I would've blown out the light.  If you look at the histogram you can see where the light is and that it is not touching the right side

The final pictures was in heavy fog at the harbor located in Corea, Maine
A dock at the Corea harbor with lobster pots.  This is the picture went out any post-processing in Lightroom.  Notice that the histogram eggs exposed to the right, there is a lot of room on the left, and there is no clipping.
Here is the same picture of the dark in Corea harbor after I post process the picture in Lightroom and in Topaz Clarity and Detail.  Notice the histogram is still exposed to the right but not touching the right side and the histogram is spread out to the left side without touching, so there is more detail in the shadows.  There also is no clipping


Using the coupon code mborn you will receive a 15% discount on any or all of the Topaz plug-ins.


Help Support my blog by purchasing from Amazon. Clicking on this link and utilizing the link does not cost you anything.
BUY FROM AMAZON

Friday, February 14, 2014

See How Zone Edit Works

In my blog yesterday I talked about a new process to help you edit your photos in Photoshop and showed an example of a picture that I reprocessed.

Blake Rudis has released a nine minute video giving an overview of the process which I have included in this blog to help you decide if it is really worthwhile. I know it is.


Click here to view more details

Simplify Link

http://www.topazlabs.com/aff/idevaffiliate.php?id=850&url=http%3A%2F%2Ftopazlabs.com%2Fsimplify The 50% promotion discount code is febsimplify and it'll be active until the end of the month

Thursday, February 13, 2014

New Post-processing Technique: Black, White & Beyond: The Digital Zone System.

 First, I did not make it down to Sachuest because I came down with a G.I. bug. So, what have done in my spare time is to increase my knowledge of post-processing. I have been following Blake Rudis, who is one of the HDR gurus, who uses HDR to create a much more dynamic picture rather than just a grunge photo. I have been utilizing his methodology of using luminosity masks to improve my photographs. He has developed a new technique of processing is photographs. This technique requires the use of Photoshop 5 or 6 or CC.
"So what is this technique?  How about I start by saying what it is not:
·    It is not a Photoshop Plug-In nor does it require any!
·    It is not the Traditional Luminosity Mask selection system using channels.
·    It is not a push button technique to make any photo look immaculate in seconds (that just doesn't exist yet)!
It is:
·    ACCURATE: A meticulous selection method based on one amazing adjustment layer (Curves) and the Gradient Scale.
·    EFFICIENT: Responsible for cutting my post processing time by 90%.
·    DELIBERATE:  I make much more informed decisions while post processing cutting out a lot of guess work and trial and error.
·    AMAZING:  I am seeing life in my photos I never thought possible.
So now I want you to have it!  I have developed a 3 hour and 40 minute training course that allows you to make better photographs utilizing the principles of Black and White photography and the Digital Zone System.  I call it: Black, White & Beyond: The Digital Zone System."

I have spent the last two days watching the three hour and 40 minute videos which introduces you to the whole concept. The package  includes 10 videos, along with a Extras folder which contains the actions needed plus the photographs that he uses in the videos so you can follow along with the videos.
Right now the package is on sale for $67 until February 24 if you use the coupon code zone30. Here is the link: Click here to view more details

Original Photograph
Tone mapped in Photomatrix Pro 5.0
Final image after using Blake's new Digital Zone And Beyond Methodology


Topaz as notified me that they are running a 50% promotion From February 13-February 28 for Topaz Simplify, which lets you turn photos into art + paintings with a single click. Simplify enables people to get a fine-art painted look without spending tons of time in Photoshop, and there’s lots of really cool things that you can do with it. Coupon Code febsimplify
 

Sunday, February 2, 2014

Adjusting Photos Utilizing Photoshop

I have posted the picture of the Northern Hawk Owl with its wing folded so only one I was peering out at you on various sites. Originally of the I just did post-processing to bring out the colors and depth of the picture. On one of my sites that I posted a few people liked it but thought that the trees that were behind the owl took away from the picture. When I first shot the picture I was with a group of people and when I was tracking the bird I only had about 10° on either side to track otherwise I would have gotten portions of the people on either side of me in the picture.

Since I have been home with a slight cold this week, I decided I would show my readers two different methods of changing the picture utilizing Photoshop CC.You can also utilize Photoshop 5.

The first method is to isolate the bird on a background of sky and clouds. No matter where I am photographing, if there is an interesting sky and clouds I take pictures of of them and keep them in a background folder so they can be utilized in a bland picture.

Step one
Step two
Step three
Steps 4 5 and 6
Step 7
Finished


The second method is to remove the unwanted objects from the picture.
Step 1

Step 2
Steps 3 and 4

Steps 5 and 6

Animated GIF showing the original and the post processed pictures
If you have any questions don't hesitate to email me and I will get back to you as soon as possible to help you


50% off Tripods and Monopods

Sunday, December 1, 2013

How and Why I Did It - Post-processing a Great Blue Heron picture

Today's blog is another blog on how and why I did it. First, I always shoot in raw and raw files need post-processing. Second, photography is a art and the final picture is how I visualize it in my mind's eye. Also, I hope these tips are useful for you and I hope you let me know your thoughts.

In my last blog about the Mandarin Duck, there also was a picture of a Great Blue Heron. As I looked further at that picture, it did not please me. So I did some further post-processing on it to hopefully make the picture better. At least so to me.

Location scenario: this picture was taken across Leverett Pond, part of the Emerald Necklace in Boston, at an island where this Great Blue Heron landed. Equipment was a Nikon D 7100, I Nikon 500 mm f/4 with a 1.4 converter, on a Gitzo tripod with a Mongoose Gimbal Head. Settings were 1/200 seconds at f/5/.6, ISO 400.

Here is the original photograph prior to post-processing.


Here is the first iteration of post-processing prior to taking the picture into Topaz Clarity and returning the photo to which I posted in the previous blog.


Original Cropped

Initial Settings
 After doing my initial settings, opening Topaz Clarity and adjusting the picture I return the picture to Lightroom and did a few further adjustments by utilizing the highlights, shadows and blacks sliders plus adding a slight vignetting to the picture. This is the picture that I posted yesterday.

 Now 24 hours later, I re-looked at the photo and felt that something was missing. I I just read a blog by my friend Denise Ippolito http://deniseippolito.com/blog/2013/11/28/the-shadow-nos/ on how to adjust the blue in the shadows. here is her how to do it

“I took my image into Photoshop and duplicated the layer (Ctrl or Cmd J) I went to IMAGE> ADJUSTMENTS> HUE & SATURATION, when the dialogue box opened I selected the Blue channel from the drop down then I went to 100% saturation in the blue- this will give me a good idea if there is a lot of blue in the shadows. If there is a lot of blue in the shadows simply slide the saturation slider all the way to 20%- this will take away the blue in the shadow but it will also take blues away from other areas within your image. To fix that just add an inverse layer mask by hitting the 'alt' or ' option· key at the same time you click on the layer mask icon. Next, simply paint the shadow area with a soft brush set to white at between 80-100% opacity.”After I followed her technique and brought the image back into Lightroom from Photoshop, I still felt that the picture was missing something and decided to utilize the radio filter in Lightroom to fix the background.


My Settings in the Radial Filter
The Final Result

Thursday, November 7, 2013

My Thoughts and How and Why I Did It

In a previous blog, I shared How I Did It.  Because of some of the replies that I received, I am going to continue with more of my thought processes and how I did it, utilizing Lightroom, Photoshop, and plug-ins.

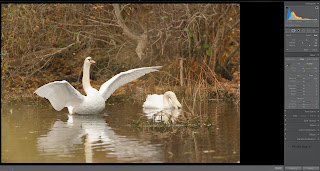
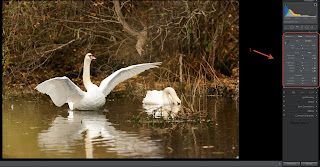
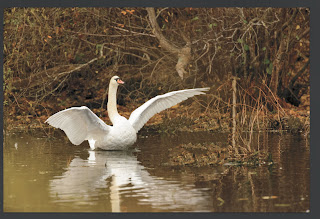
In my last blog, I had the picture of the mute Swan with its wings spread and the other Swan with its head out of the water.  I had a different picture of the mute Swan with its wings spread, but the other Swan had its head under the water.  My thought was that I would like to post process this picture and only keep the Swan with its wings spread in it.


Here is the original picture, I first try to remove the second Swan using the spot removal tool in Lightroom, but it would not work.  So I did my initial processing of the picture in Lightroom.


Exporting the picture, utilizing control-E, into Photoshop, I added a new layer, utilizing the layer button at the bottom of the layers panel.  I then utilize the clone stamp, taking pieces from different parts of the picture and then help blend it utilizing the lasso tool and contents aware.


Once I had it to my liking, I did my first crop.


 I have been utilizing Topaz clarity plug-in for many of my pictures.  I like it because it doesn't give halos and that the presets are easily customized utilizing the sliders and/or the mask.  I duplicated the layer and then opened Topaz clarity.  In Clarity: 1 - Picked the Collection to use; 2 - Picked the Pre-set to use;  3 - Adjusted the preset to my taste.


After I was finished, I flatten the picture in Photoshop and then exported the picture as a PSD back into Lightroom, where I've made a few more adjustments and fixed the crop.

Final Result
I hope this has been useful and if you have any questions please email me.

Sunday, November 3, 2013

How I Did It. Having Fun with Photoshop

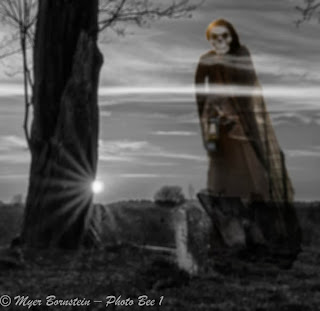
The other night was Halloween, and I wanted to create a picture suitable for the night.  I thought about it for a while, thinking do I want pumpkins like everybody else, or do I want to do something different.  I decided to do something different.  Here is how I did it.

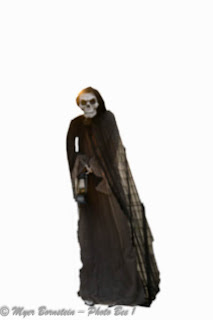
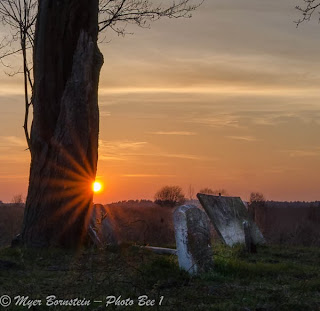
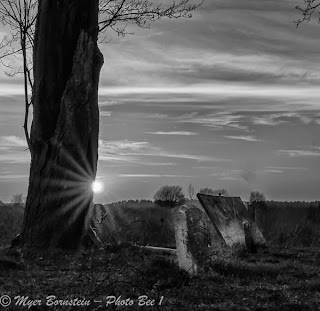
My neighbors in my condo building had a "Grim Reaper" hanging on their front porch.  I grabbed my camera and took a couple of pictures of it.  After importing it into Lightroom, I exported to edit the picture in Photoshop.  First, I needed to isolate the Grim Reaper from its background and I utilized the quick selection tool and the refined edge tool.  I then moved the selection to a separate layer.  Next, I went into my files in Lightroom and found a cemetery picture that I had converted to black and white.  I then opened that also into Photoshop.  Next, in Photoshop on the Windows setting > Arrange > Float All in Windows.  Now that I had both pictures open, first I selected the Grim Reaper and blurred it slightly.  Using the move tool.  I then moved to Grim Reaper to the cemetery picture.  However, it was too large initially, so I removed it from the picture and then downsides the Grim Reaper, so it would fit better in the cemetery picture.  I then brought the Grim Reaper back into the cemetery picture lower the opacity, and turned on the overlay setting and adjusted it to where I wanted it, and that the underlying tombstone would standout.  I then did a slight blur on the whole picture, flatten the levels and got my final picture.  What do you think about the result?

Original picture
Picture after utilizing the quick selection tool and placing the picture in a new layer
Original picture
Converted to black and white
Happy Halloween

Tuesday, October 1, 2013

Improving Your Postprocessing by Watching Videos of Other Photographers Workflow

Version 1
Recently I have started to look at my older pictures and reprocess them.  The reason for this, as I been progressing in my use of Lightroom and Photoshop, plus the plug-ins from NIK and Topaz, along with a few others, I have learned how to process my photos better.  NIK and Topaz have had a great number of educational webinars on how to use their products, plus there are a number of videos from different photographers on their workflow and utilization of Lightroom and Photoshop.  By watching these presentations I have learned a number of different ways a post-processing and it is help me to develop my own workflow.  You cannot remain static, you must continue to learn and think and develop your own style.

I will show you some pictures, the original be version 1 and the reprocessed version 2.  Some of the facts may be subtle, but on my computer screen, there is enough of a difference to see the change.

Version 1

Version 2
Version 1
Version 2

Version 1
Version 2

Version 1
Version 2