 |
| Sun Setting in the Fog |
One of the new additions to Lightroom in the CC 2015 version is the
DEHAZE SLIDER. Here is what Julianne Kost wrote about this control "The new Dehaze control in Lightroom CC and Adobe Camera Raw 9.1 can help you to dramatically improve an image by removing haze. The Dehaze technology is based on a physical model of how light is transmitted, and it tries to estimate light that is lost due to absorption and scattering through the atmosphere. For the best results, you’ll want to set the white balance for the image before using Dehaze. Then, in the Effects panel, move the slider to the right – to easily remove the haze from the original scene. Move the slider to the left to add a creative haze effect.You can choose to make very subtle to very significant adjustments – if you’re pushing the slider to the extreme, you might want to refine the image using the Basic panel (increasing the shadow detail or refining the Vibrance slider) in order to achieve the exact look that you’re after."
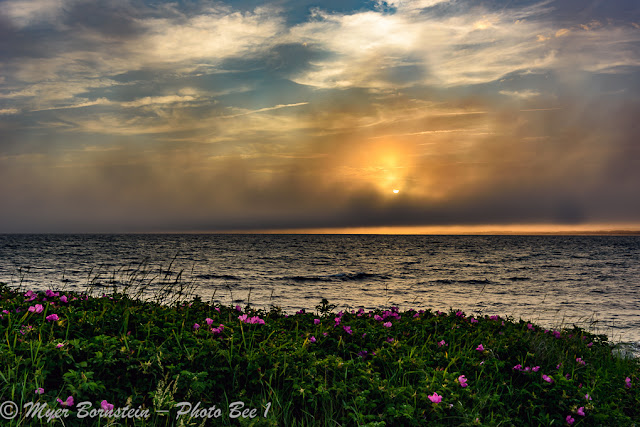
The other day, I went out to Gooseberry to photograph the sunset, and a fog bank came in and created almost a pure white sky except you could see the outline of the sun. I photographed the scene, and since both Photoshop and Lightroom CC 2015 updates were released. I download the the new releases onto my computer and decided to try out the new dehaze slider. Here are my results. Only Lightroom was used for all my adjustments without the use of any third-party plug-ins.
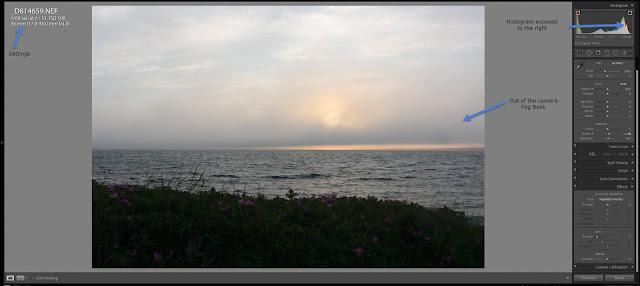 |
| Original Photograph Opened in Lightroom with Only Vibrance and Saturation Adjusted |
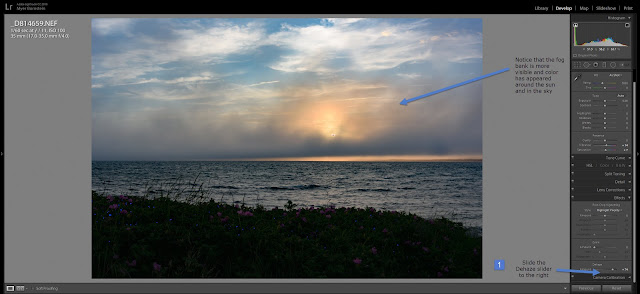 |
| Same Photograph with the Only Addition Be in the Use of the Dehaze Slider |
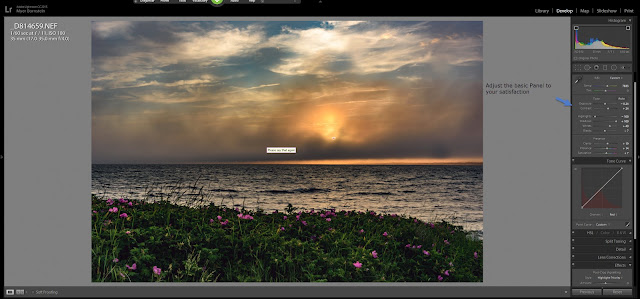 |
| My Adjustments in the Basic Panel |
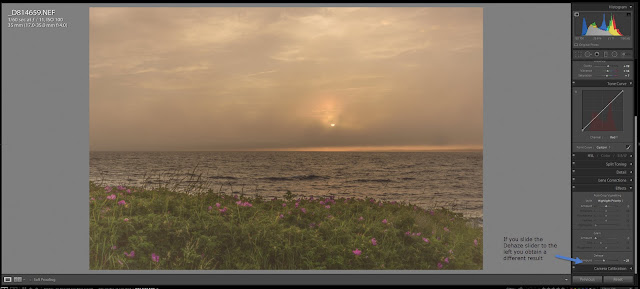 |
Sliding the Dehaze Slider to the Left You Get a Different Result
Therefore, in my opinion the dehaze slider makes it worth the price for subscribing to the $10/month price for Photoshop and Lightroom.
|


No comments:
Post a Comment