The other night was Halloween, and I wanted to create a picture suitable for the night. I thought about it for a while, thinking do I want pumpkins like everybody else, or do I want to do something different. I decided to do something different. Here is how I did it.
My neighbors in my condo building had a "Grim Reaper" hanging on their front porch. I grabbed my camera and took a couple of pictures of it. After importing it into Lightroom, I exported to edit the picture in Photoshop. First, I needed to isolate the Grim Reaper from its background and I utilized the quick selection tool and the refined edge tool. I then moved the selection to a separate layer. Next, I went into my files in Lightroom and found a cemetery picture that I had converted to black and white. I then opened that also into Photoshop. Next, in Photoshop on the Windows setting > Arrange > Float All in Windows. Now that I had both pictures open, first I selected the Grim Reaper and blurred it slightly. Using the move tool. I then moved to Grim Reaper to the cemetery picture. However, it was too large initially, so I removed it from the picture and then downsides the Grim Reaper, so it would fit better in the cemetery picture. I then brought the Grim Reaper back into the cemetery picture lower the opacity, and turned on the overlay setting and adjusted it to where I wanted it, and that the underlying tombstone would standout. I then did a slight blur on the whole picture, flatten the levels and got my final picture. What do you think about the result?
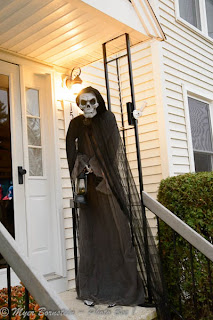 |
| Original picture |
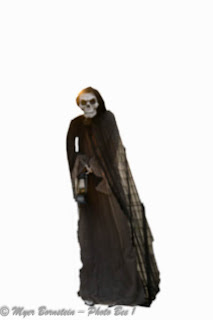 |
| Picture after utilizing the quick selection tool and placing the picture in a new layer |
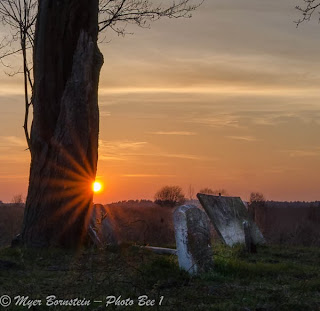 |
| Original picture |
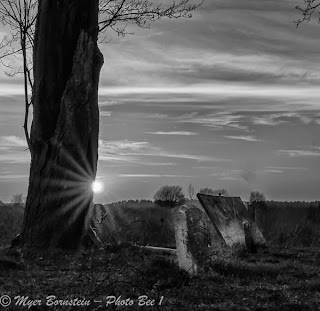 |
| Converted to black and white |
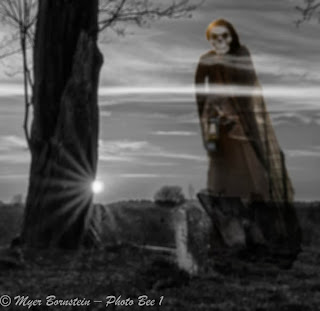 |
| Happy Halloween |


No comments:
Post a Comment